I wanted to send my seniors off with something fun that would leave them with some lasting memories. I stumbled onto the idea of creating time capsules with water bottles. Some searching showed me some images, and I found some TPT resources that seemed more appropriate for younger students. So, I set out to make my own version.
To make this work I needed 72 water bottles. My students were happy to bring those in, often in large bags, but I would not tell them why, just that we needed them for a project we would do at the end of the year. This built some suspense.
I created the 'label' for the bottles in a Google Drawing and then added that image five times to a Google Doc. (Templates below) I printed that 15 times on a color printer because our school logo was in color. I cut those with a paper-cutter to get it done faster. I also asked a student to remove all the existing labels from the bottles and remove all the caps a few days before we did the project. Making sure the bottles are dry is important before adding paper to them.
I gave each student their bottle label so they could add their name, and the date they wanted to open it. Then I visited their tables to tape on the the labels. While I was doing that, my students worked on their "white sheets." This is also a good time to make a label and a bottle for any absent students.

The "white sheet" was where students could write about themselves; their favorites, and predictions for their life. I copied one for each student. If you want to spread the project over several days you could give students the "white sheet" as a warmup the day before or for homework.
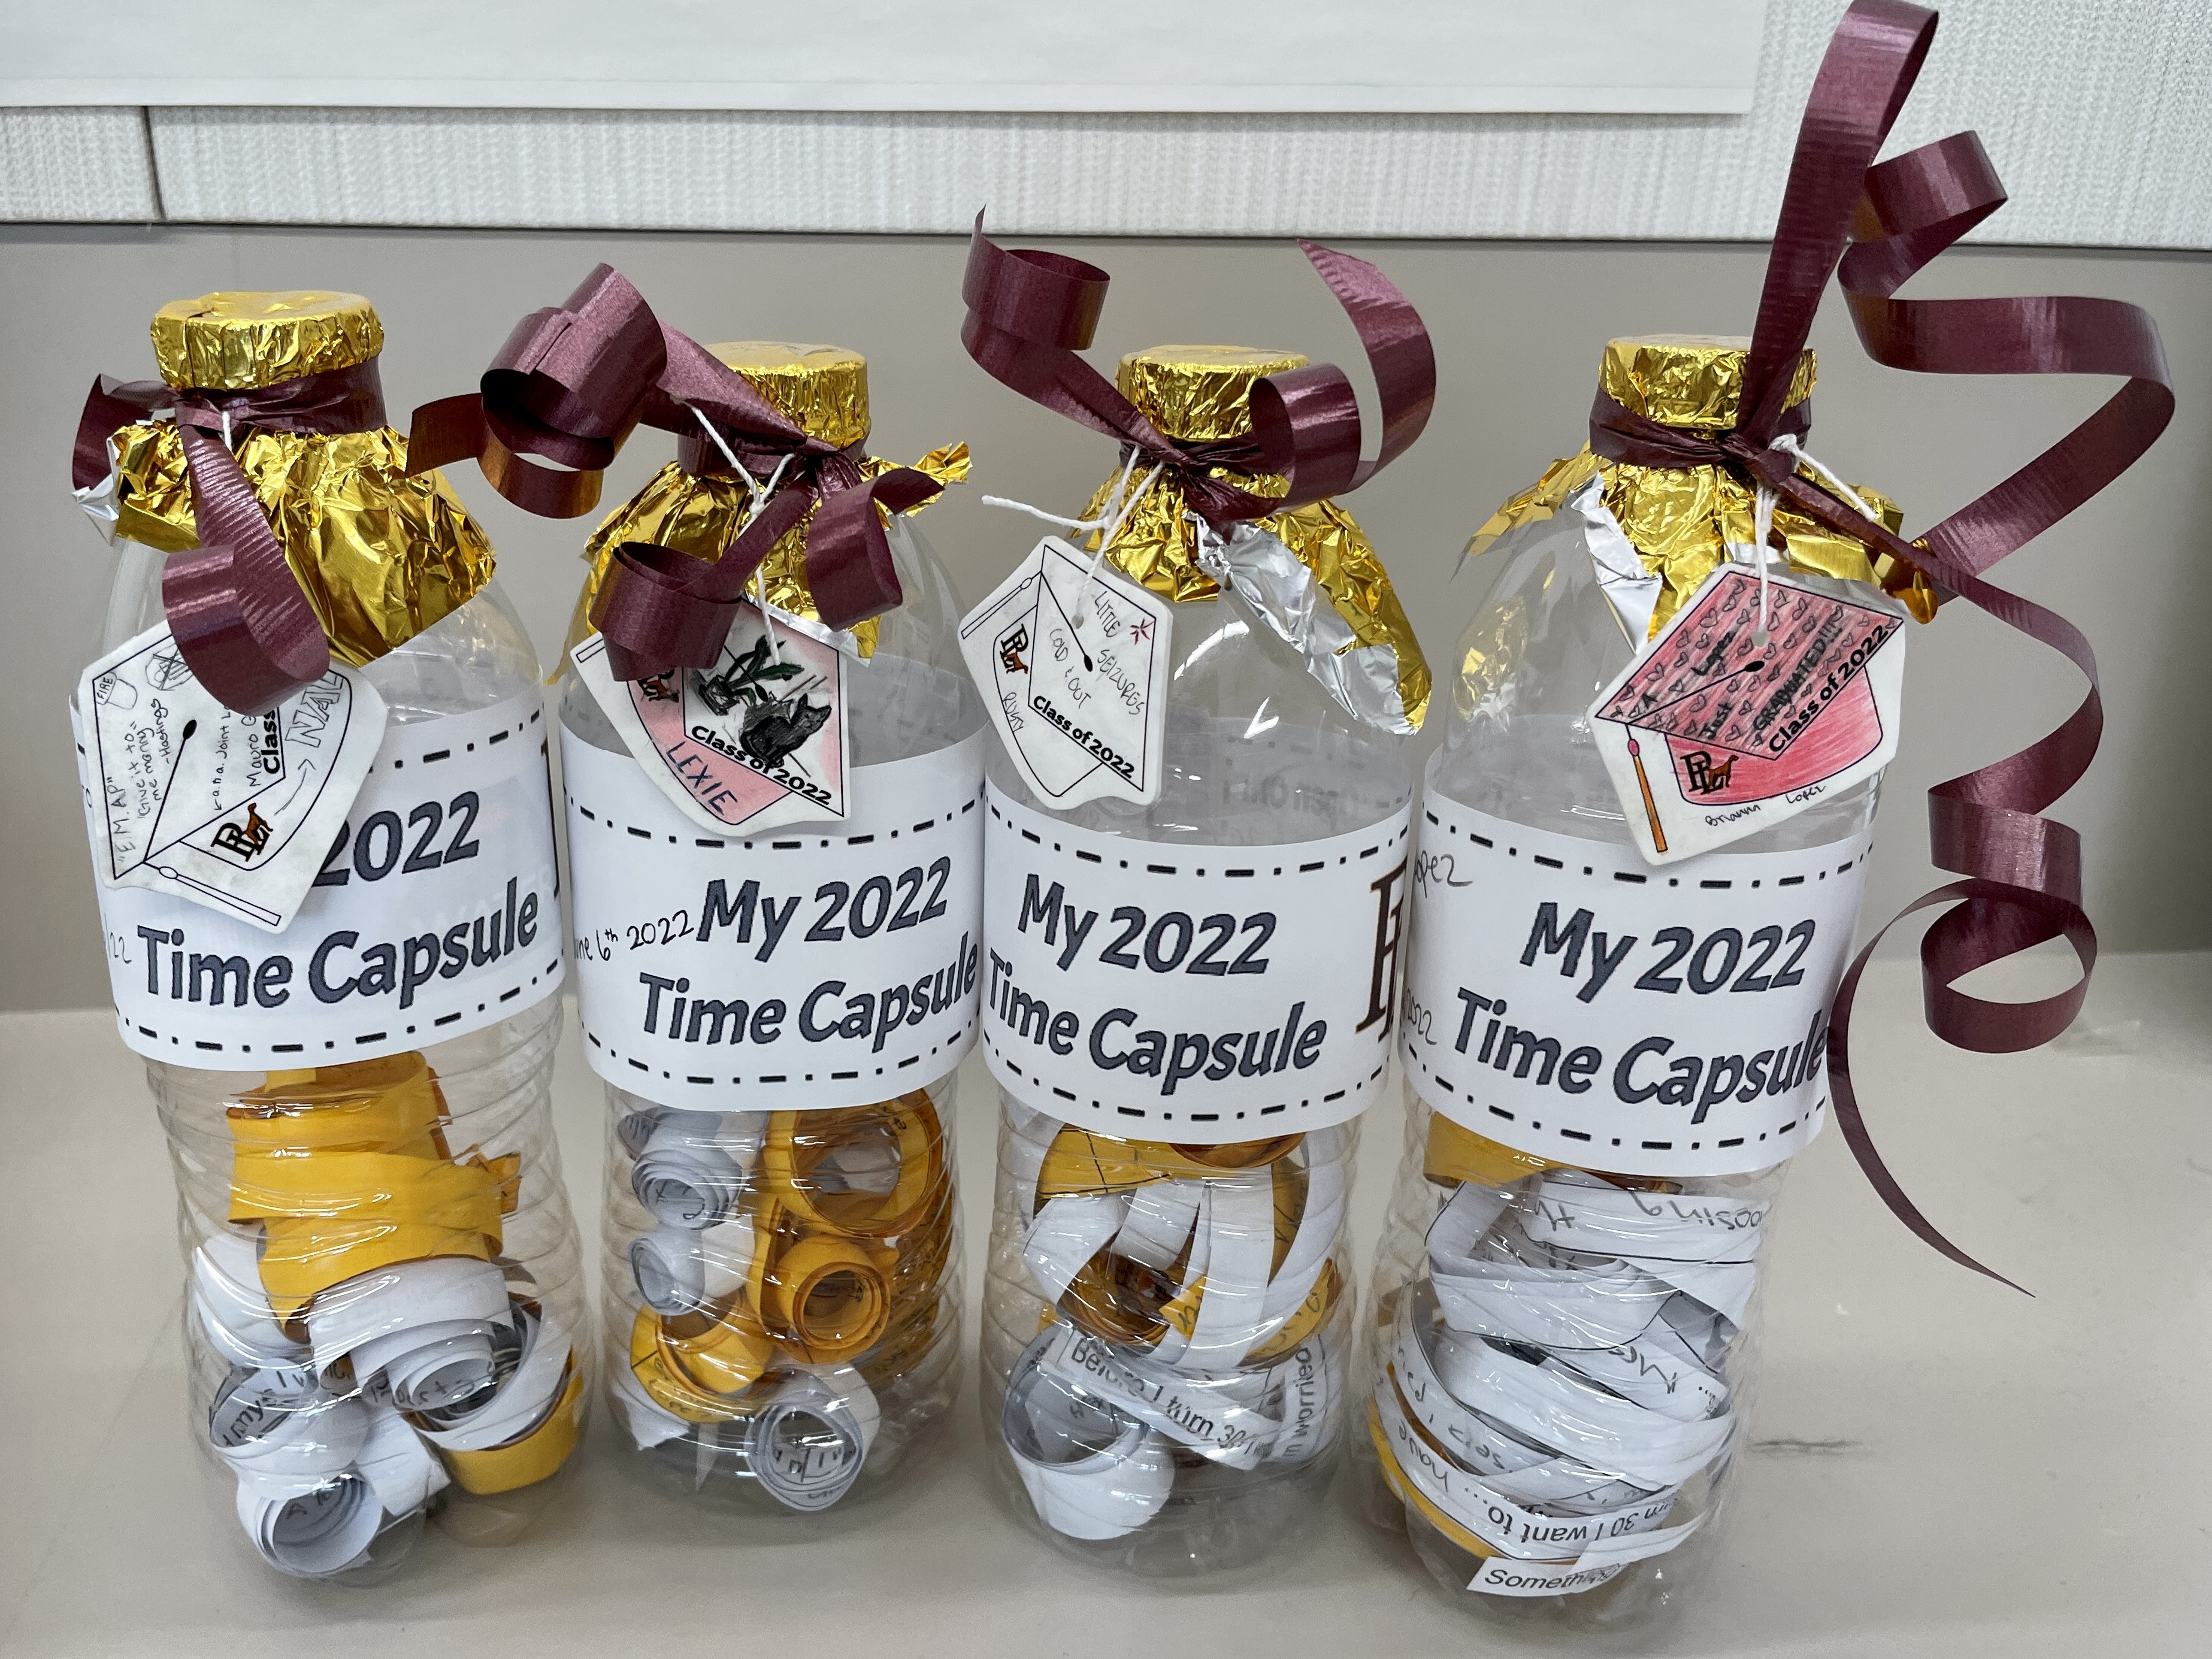
After writing their answers on the sheet, students cut it into strips, wrap each strip around a pencil and drop it into their bottle.
Next came the "gold sheets," of course you can print these on any color that works for you. Our school colors are burgundy and gold, so I used burgundy ribbon and goldenrod paper.

The "gold sheets" are a little challenging to set up. I wanted to be sure all students got some notes from classmates, so I included six names on each sheet. That meant I needed six sheets, with six names each to account for my 36 students in each period. That left six empty rows on each sheet for students to address to any classmate they wanted to. Having all students write to all classmates would have been very time consuming, so I opted for up to 12 students each.
Again, students cut their messages into strips and wound them around a pen or pencil before dropping them into classmates bottles.
Once students had dropped all their messages, we screwed on the bottle caps. If you don't have enough caps, or caps don't fit because they got randomized, you can also seal the bottles with some masking tape.
For a decorative and celebratory touch, I covered each cap with a square of gold foil and tied some curling ribbon around the bottle neck. (Affiliate links send a small percentage of your purchase to fund books for my classroom.)
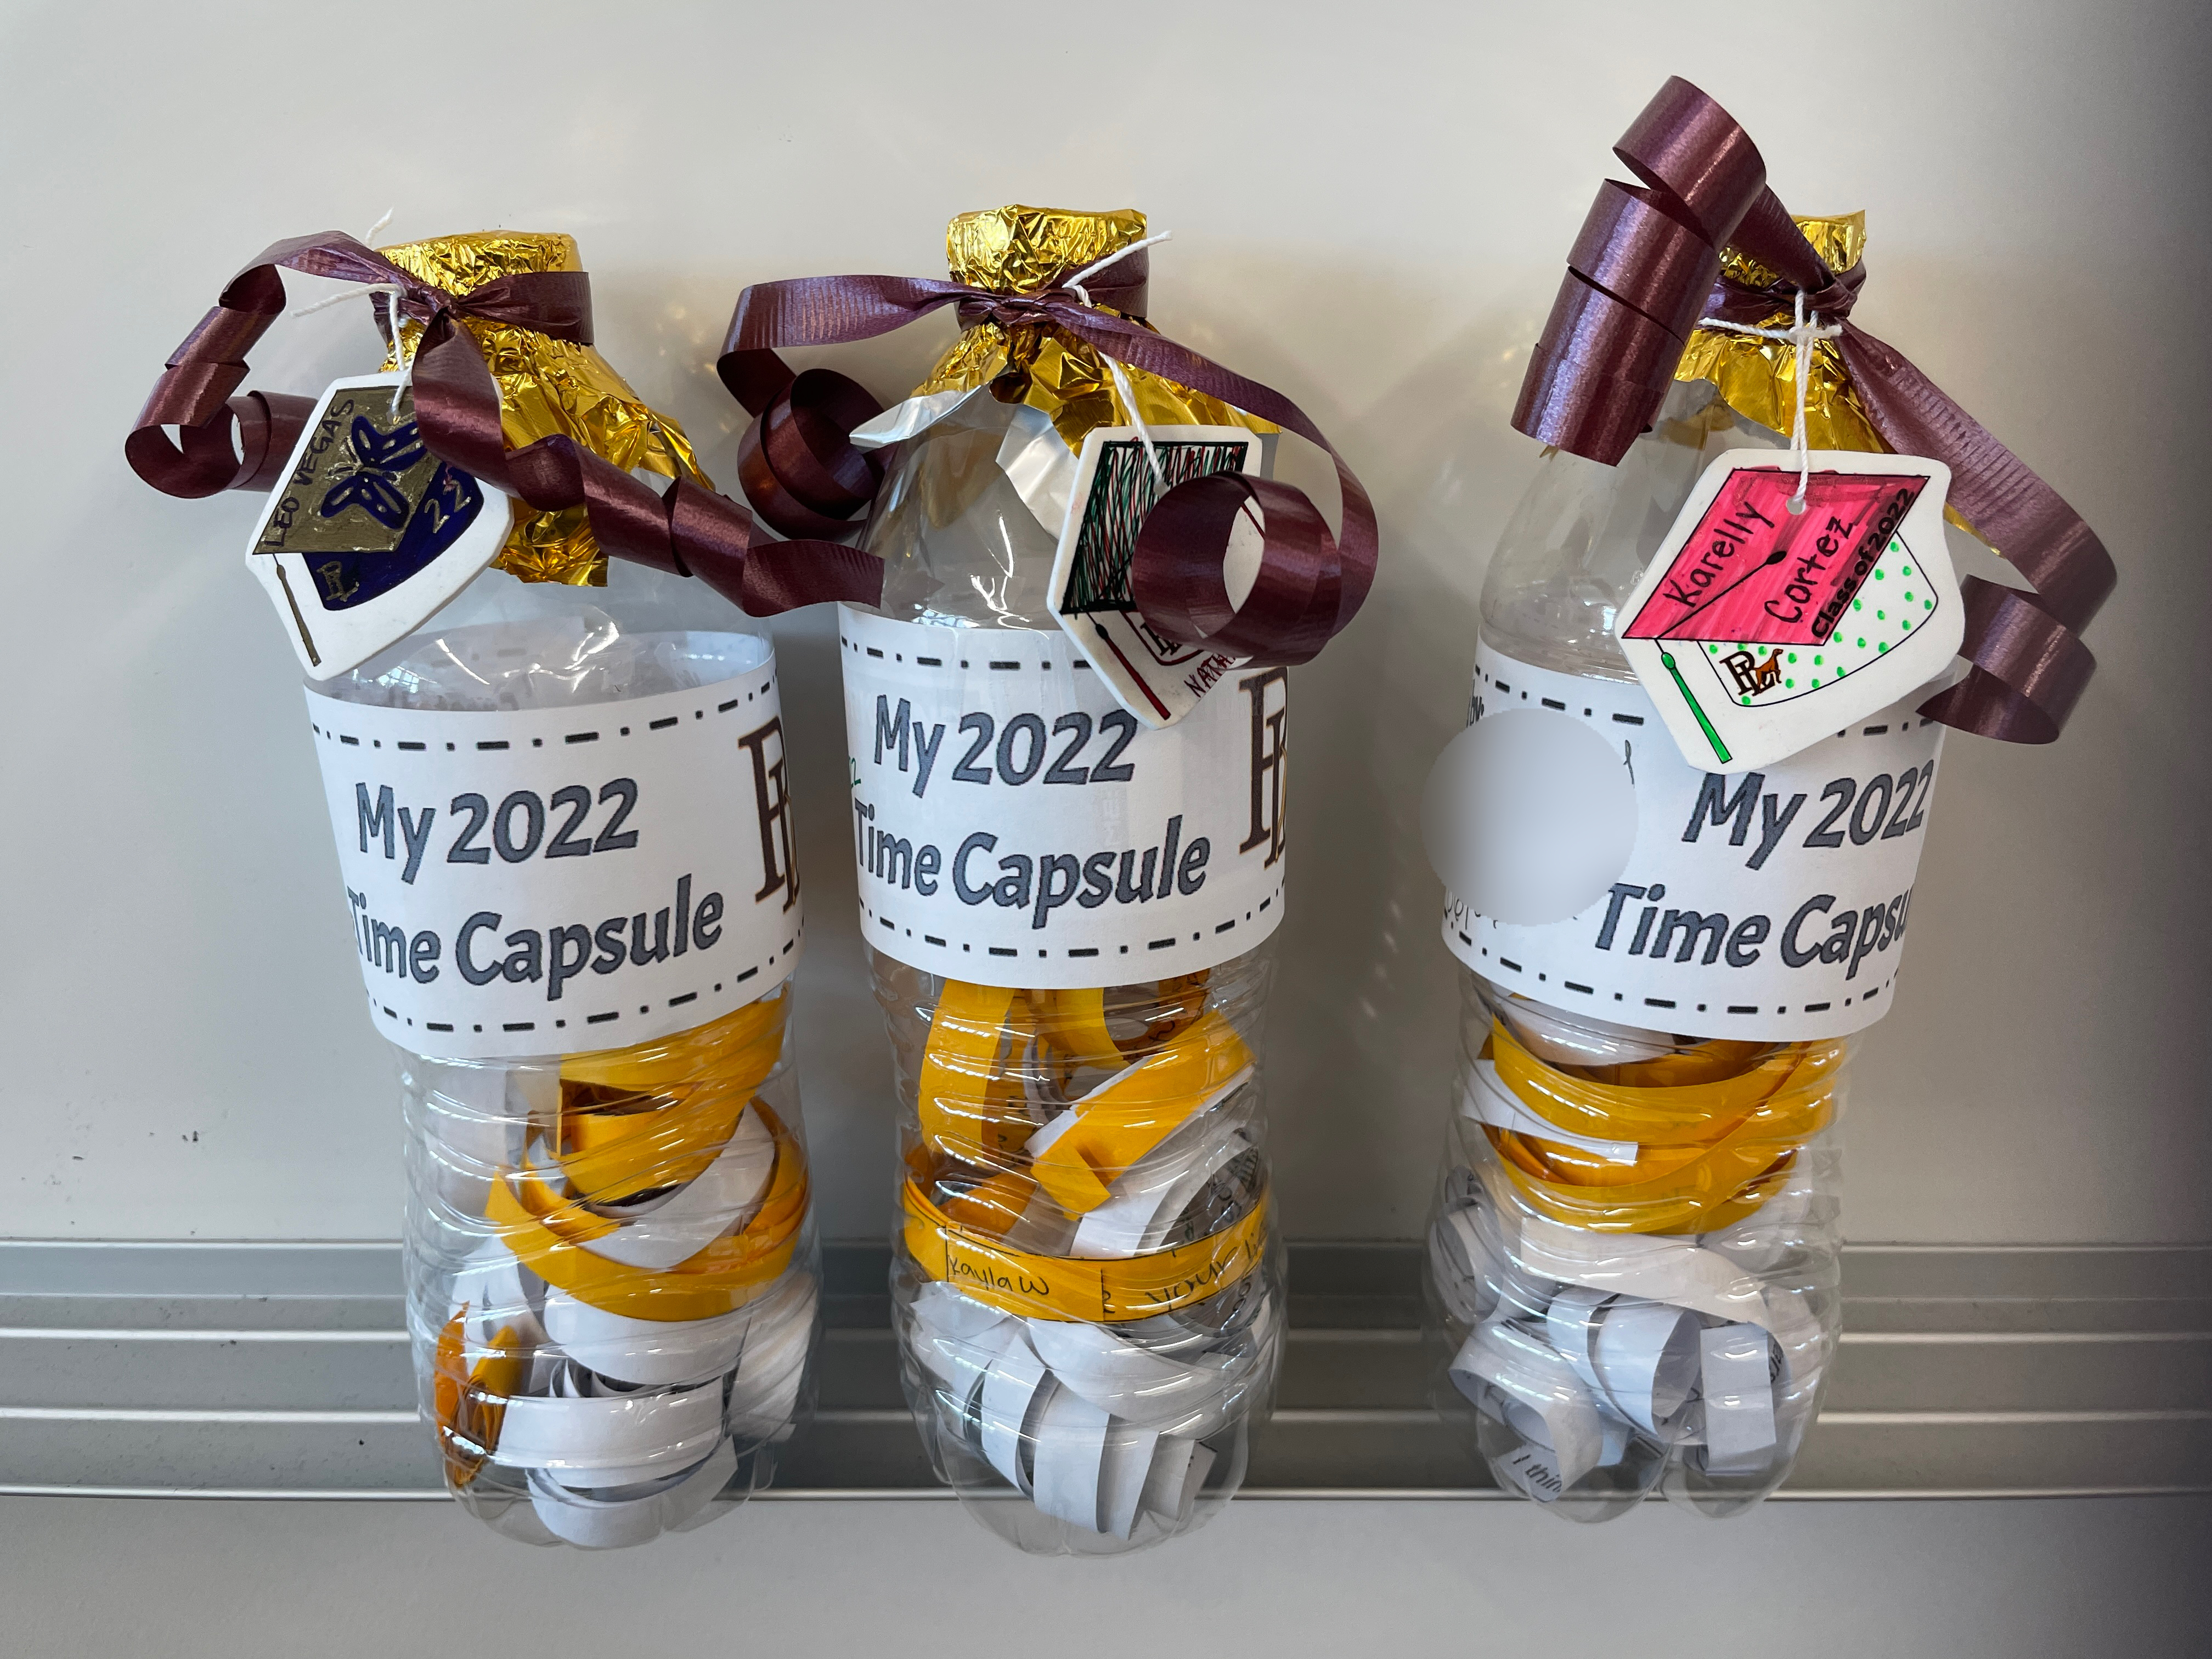
The Graduation Caps

The small custom plastic graduation caps tied on the bottles in the picture above were made with plastic shrink sheets. (Think Shrinky-Dinks if you made those as a child.) My students had no experience with this. They didn't believe me that their designs would get smaller.
I created the graduation cap icon with a few shapes in a Google Drawing. I added our school logo and the graduation year. I downloaded that image, and fit six of them onto a Google Doc.
I printed that doc on sheets of shrinkable plastic. There were a few sheets that just would not print completely, so I recommend buying a little more than you think you need.
I cut around the caps, leaving about 1/4 inch of space. If you haven't worked with this kind. of plastic before, it helps if you keep all corners rounded, otherwise there are sharp points after they shrink. It took me about an hour to cut around 72 caps, but it is something you can do while watching TV or enjoying an audio book.

My students customized their caps with pens and pencils. Next time I will encourage more of them to use colors and markers. Very important: Use a hole punch to add a hole to the grad cap somewhere. I did this after my students decorated, so that I could place the hole where it would not interfere with their design. Next time, I'll punch two connected holes, so that it will be a little easier to fit the ribbon through. This year I had to use some white string to create a loop so that I could tie the grad caps on the bottles.
I took the decorated caps home and baked them according to the directions on the shrink sheet package. They bake very quickly, under two minutes per baking sheet. I was done with 72 in under 30 minutes, including the time it took to preheat the oven.
Now, I feel like a food blogger. Not only have I just mentioned using the oven, but I am finally getting to the things you need to make this work. All the docs I created to make this project are in this Google Drive folder.
That folder includes the list below, but I also linked them individually for you.
4. The 'gold sheet' for students to write notes to their classmates. Add six student names to each sheet and print six times for a class of 36 students. If you teach multiple periods, you'll need a different copy of this doc for each period because you'll be adding different names.
5. Teacher notes for time capsule. This doc has 36 rows. I added all of my students' names and wrote a note to each of them. I printed this on the same goldenrod paper I used for the notes to classmates.
6. The grad cap icon Google drawing. Customize this with your school logo, download and see if you can fit six on a doc. You might need to adjust the size of the cap to fit six. You can of course adjust the number and size based on your class size etc.
Some students asked where I would be keeping their time capsules and how they would get them from me. They were happy to hear they could take them home. I have no idea why they thought I would be storing the bottles for them. I suggested they put them in the back of a closet and rediscover them later. 
This was a fun way to celebrate the end of the year and the end of high school for my students. The time capsules ask them to consider life five or ten years in the future. Many of them hadn't thought past their plans for the summer or the next year.
With a little tweaking this could also be a fun way to begin the school year. Perhaps I will do it the first week of school with my 9th graders for them to open as they graduate.
Comments
Post a Comment
Thanks for your comment on this post. If you have an urgent question you may want to reach out to me on BlueSky @jenroberts.bsky.social.
Comments on this blog are moderated for posts more than five days old to cut down on spam, so if you are commenting on an older post it may not appear right away.
If something here helped you, feel free to donate $5 toward my classroom library at https://www.buymeacoffee.com/jroberts1